Creating a Blogger Template: A Step-by-Step Guide
Are you looking for information on how to create a Blogger template for your blog? In this article, we will guide you through the process of creating a Blogger template step by step.
Step 1: Plan Your Design
The first step to creating a Blogger template is to plan out your design. You can start by sketching out a rough design on paper or using a design software like Adobe Photoshop or Sketch. Your design should be visually appealing, easy to navigate, and functional.
Step 2: Choose a Layout
Once you have your design planned out, it's time to choose a layout for your template. Blogger offers a variety of layouts to choose from, such as simple, picture window, sidebar on the left, and more. Choose the layout that best suits your design and content.
Step 3: Code Your Template
The next step is to code your template. You can do this by using HTML, CSS, and JavaScript. If you are not familiar with coding, you can use a pre-made template and modify it to fit your design.
Step 4: Add Widgets and Customizations
After coding your template, it's time to add widgets and customizations. You can add widgets such as social media buttons, search bars, and related posts. You can also customize your template by changing the font, color, and background.
Step 5: Test Your Template
Once you have finished designing and coding your template, it's important to test it before making it live. You can do this by previewing your template in Blogger's template editor or by publishing it to a test blog.
Step 6: Publish Your Template
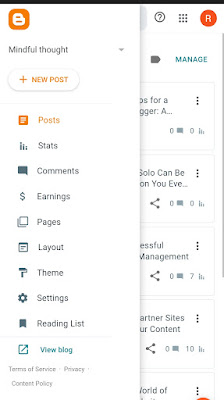
Finally, when you are satisfied with your template, you can publish it to your blog. You can do this by going to the "Theme" section in the Blogger dashboard and clicking on "Customize." From there, you can upload your template and make any final adjustments.
In conclusion, creating a Blogger template can be a rewarding experience that allows you to customize your blog and stand out from the crowd. By following these steps, you can create a beautiful and functional template that is perfect for your blog
If you are looking for an AdSense approval template for your Blogger blog, you can follow these guidelines to make your blog AdSense ready:
Choose a clean and professional template: Avoid using flashy templates that distract your readers from your content. Choose a simple and professional-looking template that is easy to navigate and read.
Create high-quality content: Your content should be original, informative, and engaging. It should be written in a way that is easy to read and understand. Use relevant keywords in your content that are related to your niche.
Add necessary pages: You need to add some necessary pages like About Us, Contact Us, and Privacy Policy to your blog. These pages help you establish credibility with your readers and AdSense team.
Optimize your blog for search engines: Make sure your blog is optimized for search engines by using relevant keywords in your titles, headings, and content. Use meta tags and descriptions to provide information about your blog to search engines.
Remove other ad networks: If you have other ad networks on your blog, remove them before applying for AdSense. This will increase your chances of getting approved.
Have enough content: Make sure your blog has enough content before applying for AdSense. It is recommended to have at least 20-30 high-quality blog posts before applying.
Follow AdSense guidelines: AdSense has strict guidelines that you need to follow. Make sure you read and understand them before applying. Violating AdSense policies can result in disapproval or even termination of your AdSense account.
By following these guidelines, you can make your Blogger blog AdSense ready and increase your chances of getting approved

Comments
Post a Comment